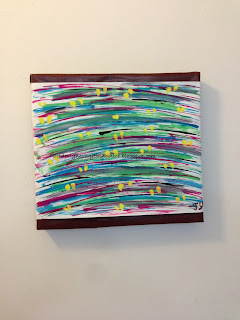
Today, i'm gonna tell you one of the easy way to hide an unused switch on the wall! This is because one of the switch for the stair light in my house was broken but i still accidentally go and try using it all the time. So, thought if i hide it with something, i will be able to not acting stupid as well as to decorate that plain boring wall =)
These are the materials i used to create a canvas-like board. Two shallow boxes i got from buying the photo frame, few piece of calender papers/other unused papers, the wood texture wallpaper and a piece of my new painting.
So, first thing is to glue the two rectangular boxes together to create a square canvas. Then, stick the papers onto the boxes to hide the edges and the glued part of the boxes.
This is how it looks like after i glue everything on. Then, if you want to be artistic/too lazy to do the next step, this can go on to the wall already lol.
Next thing i do is turn the box around and measure the length of wallpaper i required using the measurement at the back of the wallpaper. Real easy. The tricky part is the next step, which is to stick on the wallpaper nicely without having bubbles popping up. If you don't have wallpaper, you can also use fabrics, papers anything you like as long as it looks nice!
And here is how it looks like after sticking the wallpaper.
And, the back view. The advantage of using two rectangular boxes is that when you hanging it on the wall, you can literally just put it on. No glue no bluetag no nails. This is because the switch will be able to handle the weight by stucking in the middle of the canvas where the two rectangular boxes is combined.
And, i put on my latest drawing on it and it looks just nice.
The final look. It makes my stairwall looks better and also add bonus points to my painting as well. The most important thing is, i won't press on the switch again!
Hope you guys like this =)


No comments:
Post a Comment