Showing posts with label Home Decor. Show all posts

Tuesday, 11 June 2013

DIY Recycle Vase

I promise u guys I will update a new post on DIY stuff and here I am, keeping the promise!

I made a recycle vase just minutes ago and I will share the experience with you right now. The ingredients needed are common household waste, plastic pet bottles. 


Big or small, size doesn't matter. And the tools required including candle, and scissors. Easy right?

First, find a ventilated place to conduct the project as inhaling the gas produced by the pet bottle while being heated is extremely unhealthy. 


Cut the top of the bottle out. You can use the top for other purposes as what I need here is only the body and bottom of the bottle. 


Light the candle and start the heating process. Be careful not to let the bottle in contact with the fire as that will make the bottle burnt in black colour. You will see the bottle slowly shrink in irregular shape as it approaches the fire. You can create a bubbly surface by heating it a little bit longer. However, please be careful not to heat a certain area for too long as that will create a hole. 


That is the finished product of mine. I splash a bit of the candle wax on top to create an artistic design. 


Put the water inside and here you have an elegant and sophisticated looking vase. You can also paint some colour on the bottle to create your own design. 

Howp you guys like it :)

Tuesday, 21 May 2013

DIY Animal Bookmarks

Hey guys, how's work/school/whatever you are doing?

Today i'm gonna talk about the bookmarks (or is it book-marker?) i made quite a while ago, using the residue material of the flower decor i made last time.

It's extremely easy! (I know i'm really lazy this week =P) I got the wheat-flour modeling dough from Daiso and the sticks are the toilet roll residue i cut off from the previous project.


These are the 3 samples i made to show the difference. Really like using this modeling dough because it is really soft and therefore very easy to shape whatever i want. Also, it is not too oily when u playing with it. Most importantly, no unpleasant smell.


The bear is the most successful sample. After i finish shaping, i leave it on the table for a day, and then i kind of heat it up by placing it next to the laptop, facing right at the laptop internal fan (or whatever it is called).


And this is the worst product. This experiment concludes that patience makes everything better. I didn't leave this one for a day before i start heating it with the laptop heat. Too hot too vigorous therefore the eyes pop out and the face has white spots all over.


And this, is just a sample of bad modeling skill haha. I was trying to make a duck by the way lol.

This can also be a great children's project as it is safe for them. Also can be used as a decoration on the study table. And most importantly, it takes only a few minutes to make it =)

Tuesday, 14 May 2013

DIY Flower Pot Transformation

Hello people what's up!

I'm always looking forward to DIY Tuesday as i get to show off my progression of transforming my room into a modern space haha. Oh well, maybe not like the professionals but i sure did some great job already lol.

Anyway, today i'm going to tell you what i did with a mini flower pot. There was a plant inside but unfortunately i'm really not good at growing plants so it died. RIP. So, the pot is no more in need so i decide to transform it to a home decor piece.


This is how it looks like originally. There are 2 major problems here: the peeled off paint and the stupid cartoon. Well, kids might love this cartoon very much but i sure don't want it as i'm not making this for a kiddo. So, the solution was to re-paint the pink area and find something to cover up the cartoon.

Creativity of my brain suggested me to paint the pink part with my unused nail polish, the bright orange one. And the cartoon can be covered up by the wallpaper i bought last time by cutting them into thin stripes and stick horizontally.


And here it is. I didn't stick the whole pot with the wallpaper as i thought a little bit of colour block effect will be great. The pot is more like a cone shape with narrower bottom part which is why the wallpaper doesn't look straight although i did stick them straight.


Guess what's in the pot people. It's not just normal sandy stones, it's lavender scented. This is obtained by opening the air-freshener mini sack of mine. I thought it will be some dried lavender flowers inside but turned out to be the sandy stones. You can actually just get the product from a store instead of doing what i did. I saw rose scented one in Daiso the other day. Unfortunately i forgot what it is called as and i can't seem to google it now. Anyway, it should be around the area of aroma sticks and candles.

Then, the next step is to put a few DIY flowers or scented sticks into the pot and make it look pretty =) Turn on ur creativity light bulb!

Tuesday, 7 May 2013

DIY Wall Art - Hide The Unused Switch!

After the dramatic general election, time to adjust my feelings back to normal lol.

Today, i'm gonna tell you one of the easy way to hide an unused switch on the wall! This is because one of the switch for the stair light in my house was broken but i still accidentally go and try using it all the time. So, thought if i hide it with something, i will be able to not acting stupid as well as to decorate that plain boring wall =)


These are the materials i used to create a canvas-like board. Two shallow boxes i got from buying the photo frame, few piece of calender papers/other unused papers, the wood texture wallpaper and a piece of my new painting.

So, first thing is to glue the two rectangular boxes together to create a square canvas. Then, stick the papers onto the boxes to hide the edges and the glued part of the boxes.


This is how it looks like after i glue everything on. Then, if you want to be artistic/too lazy to do the next step, this can go on to the wall already lol.


Next thing i do is turn the box around and measure the length of wallpaper i required using the measurement at the back of the wallpaper. Real easy. The tricky part is the next step, which is to stick on the wallpaper nicely without having bubbles popping up. If you don't have wallpaper, you can also use fabrics, papers anything you like as long as it looks nice!


And here is how it looks like after sticking the wallpaper.


And, the back view. The advantage of using two rectangular boxes is that when you hanging it on the wall, you can literally just put it on. No glue no bluetag no nails. This is because the switch will be able to handle the weight by stucking in the middle of the canvas where the two rectangular boxes is combined.


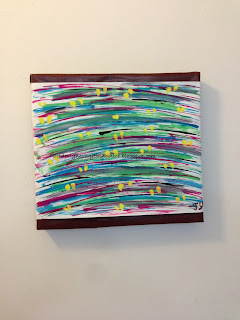
And, i put on my latest drawing on it and it looks just nice.


The final look. It makes my stairwall looks better and also add bonus points to my painting as well. The most important thing is, i won't press on the switch again!

Hope you guys like this =)

Tuesday, 30 April 2013

DIY Flower Decor

Hello people! Today is DIY day. Hope this topic can help you to reduce rubbish by recycling the materials to do some art works =)

Saw the egg carton that was prepared to be thrown away and thought i can do something with it for some mini projects.


So i cut out the egg carton into the shape of flowers.  And prepare some colours for the flower and some green papers or fabrics for the background. My plan was to use the toilet roll as the pot to accommodate the flowers.


Colouring can take some time as i need to make sure it is completely dried. I used orange and light blue to create the colour-block effect.

The green background should have enough volume to tuck into the toilet roll which has 1/4 portion being cut out to accommodate the flowers.


I used some wheat-flour modeling dough to decorate the centre of the flower. But you can also use something else, e.g. buttons, or any other creative materials.


Lastly, use blue tag or glue to secure the flower on the green materials in the toilet roll and here goes your DIY flower pot which can be hanged or stuck on the wall. You can also paint the toilet roll to make look more sophisticated.


I decide to put the flower pot on the wall decorating my mini art gallery. It makes the wall look more vibrant and lively. So i'm satisfied with this effect =)

Ps: Today the company i applied for called me! Hopefully i'll get an interview soon and start working asap =) Fingers crossed!

Tuesday, 9 April 2013

DIY Plushies' Tissue Box

So yesterday i was thinking about what to write for today's post, the original thought was to share some of the creative and interesting furnitures i saw online, but that was because i had no new DIY products made. However, when it was like 8pm at night, i saw this cute little yellow platypus sitting on my shelf. It was a souvenir i bought from Japan ages ago, i bought it because the green bun at its mouth can be pulled out and it will kinda "eat" the bun back. Unfortunately, few months ago, the eating trick won't work anymore so i just put it on the shelf and leave it there. Sad case.


Looking at my favourite plush toy, i made up my mind. I'm gonna make it a useful toy instead of just lying there on the shelf and accummulates dust. So, i took out the scissors, glue and a packet of tissue. Guess what, I'm gonna make it a tissue box!

It was a simple surgery, first i cut the middle of its head following the seam line (Sorry for hurting you my platypus!). Just a hole that can fit the tissue in and took out the small tool that now failed to do the eating trick.


Then, you can pulled the string that attached to the green bun and glue the green bun to the mouth so that it won't fall out. Lastly, i took out some of the stuffing material so that the packet of tissue can fit in. And, that's it! Easy simple and quick as a wink =)


The photo shown is before i glue the mouth.

Anyway, thanks to the tissue box idea and my platypus can once again stay on my table. Even better now as it can provide me tissues!

ps: If u want to have some viariation, you can buy different colour of tissues, which can add more fun to this cute tissue box, i.e. the platypus can have different hair colour =P